Project


0 to 30 in Nine Years

This motorcycle is featured in two publications:

After collecting RC30 parts for years in anticipation of the imminent shortage of them I got carried away. I started with getting parts from eBay, then from friends, then mostly from dealers and NOS suppliers. What you see below is the realization of my recognition that I had collected too many parts. I began to refurbish parts years ago in the hopes that someday I might assemble one of these machines on my own. The bike you see below was built entirely from parts and at one time was in boxes and sandwich baggies in my warehouse. I didn't have a wrecked or worn bike to start with, or even a used engine. Over the years the used parts (and some of the new ones) were removed and restored, then returned to the warehouse. During the winter of 2012 it became apparent there was nothing significant left to restore or source, and I began the assembly.

This machine is built to Canadian specification. Difficult to find items like a Canadian rear fender and a Canadian speedometer were found after years of looking. Even the front reflector brackets took some time to locate.

Only one person laid a hand on one part  of this project besides me (Ed Sorbo at Lindemann Engineering for the rear shock internal rebuild). Other than that, I did every single aspect of the restoration and build myself. Not many people can make that claim. It is easy to send parts out for powder coating or have some RC30 guru build you an engine. Anyone can do that. Most of this machine is new but then again, hundreds of parts are restored. There are approximately 1900 pieces in one of these creations and about 750 form the engine. That is a lot of parts to keep track of.

RC30 Started For First Time

This image was captured from a video about 2 minutes after the initial start. It was cool that day so the exhaust outlet is steaming. The smoke coming up from the engine is the ceramic exhaust wrap cooking; it stops after it is baked in. It idles perfectly and is crisp and clean.

The following images are in no particular order or time sequence.These images and descriptions are merely samples. The amount of work was more than what the average person would imagine but I can't realistically show everything.


Front Caliper Rebuild
Ready to assemble the front brake calipers. These are stock Nissin 4 piston calipers done in charcoal metallic powder/clear. The HH metallic pads in the picture were not installed. I used GG rated EBC pads with a lower coefficient of friction material. I do not want to grind away my cast iron Moriwaki rotors. The GG pads on the cast iron disks give a fantastic feel. Much better and progressive than metallic pads on stock stainless disks. Note that some RC30's originally came with GG pads and some with HH pads.
Metallic Powder Base Coat Before Cooking
The clutch cover just after the powder was put on but obviously before it is cooked. This cover was undamaged before I started but I wanted it to match the other engine covers. It was from an early H Spec bike. I fixed the ugly casting zits that  afflict all clutch covers on the lower portion below the ribs.
RC30 Valve Cover
Before finishing the outside the valve covers were coated on the inside with satin epoxy powder to protect the magnesium. Epoxy is great for oil and temperature resistance but is generally poor for UV resistance. Not many UV rays inside the engine. If there is it blew up big time so it won't matter anyway. This is the rear cover as evident by the central hole in it where it connects to the oil vapour breather/separator. There is a hokey little pickup that bolts to the inside of the valve cover and provides some initial vapor separation. Use Loctite on those pickup bolts for sure.
RC30 Rear Valve Cover
The rear valve cover.  This is the "base coat". A proprietary mixture of 3 TGIC metallic powders. It has to be baked on, then the high gloss TGIC clear coat done over top and baked again. These valve covers were a pain in the butt as there is nowhere to easily hold them while you coat and cook. I devised a tool to support them and provide a place for the ground wire for powder coating.
The rear valve cover after cooking the base coat then clear coated and baked again. Much nicer than the splash job Honda did. I had to remove the threaded in nipple to clean the threads off before I did any work on it. The powder coating would have cooked the sealant and the smoke would have destroyed the finish. I powdercoated the nipple separately and installed it after the coating was complete.
Removing Bad First Powder Coat Job
I was not satisfied with the clutch cover finish so off comes the powder coating and the clear coat. The clear coat was not up to my standard. The second try worked perfectly. I had mixed up extra powder so had no concern about the color matching. It came off easily with chemical stripper because of the shiny bead blasted finish.

This is a good example that powder coating is not "bullet-proof" as some people think. Brake fluid will do the same thing as the chemical stripper did, it just takes longer.
RC30 Crank Rods Pistons Rings
Some of the rotating assembly ready for final inspection, prep and installation. All the parts are new; a "B" weight crankshaft, rods and standard bore (70.0 mm) pistons. I hand picked the pistons to match the bores of the new crankcases that Honda was kind enough to pre-hone for me. Preparing the cam drive gear on the crank took me hours with dental tools and other devices. I was not happy about having to do this. I believe it was caused by oil contamination on the gear during heat treating of the crank gear. Other than that the crankshaft was a very well made forging. If I was to do this over I would use Carillo steel rods for their robustness over the Honda titanium alloy rods. If you ever re-use the Honda rods you should re-apply the anti-friction coating to sides of the big ends if they are scored up, and they likely will be. Titanium is really bad for wanting to gall/weld itself to itself; one of the many undesirable properties of the material. Titanium is far from being all roses from an engineering perspective. Carillo steel connecting rods would not need a coating. The cast piston skirts also have an anti-friction coating. These pistons are of a single compression ring type. I would have preferred two compression rings but nobody makes them unless you go the Arias custom route and I have too many Honda pistons to do that.
RC30 Left Crankshaft Main Journal
RC30 Right Crankshaft Main Journal
Honda uses a number-letter code system to determine what bearings to select. Although this is a great idea and can save a lot of time during engine assembly for a motorcycle repair shop I still measure things to double check and use plastigage as a final check, just as Honda says to. If you have a used crankshaft or connecting rods sometimes the codes may be missing so you will have to measure the journal or bare bore to initially pick a bearing. Crank journals can also wear enough that you may have to tighten up the bearing selection also. The crankcase letter codes are dot etched into the right side of the crankcase behind the primary drive gear/starter clutch. The primary drive gear has to be removed to read the codes. The crank codes (rods and mains) are painted on the counterweights. The numbers are the main journal codes and the letters are the rod journal codes. This engine was assembled using all new rotating/reciprocating parts so one would hope that the end result color codes for the bearings would be correct, and they were. I nailed all the clearances on the first try as I should. Above is the left crank main at around 0.0018" and the right main is below at about the same clearance. This is on the loose side of spec. The two center crank main bearings have smaller central oil holes in order to provide adequate oil pressure to the camshafts which are fed from the gallery above those two main bearings. When doing this sort of thing cleanliness is extremely important. Bearing babbit does not tolerate any recklessness.
Rebuilt Carbs
The carburetors after restoration. All of the steel parts were zinc plated and chromated where necessary. Carburetor casting were cleaned in dip carburetor cleaner for a few days and then boiled in distilled water. These are low mileage units but I hate dealing with carburetor problems at start-up so they still got the full treatment. Nobody likes to take RC30 fuel mixers off (but it really is not that difficult). I glass bead blasted the plenum and used an new flame arrestor. Always use Honda rebuild kits on these and for do not over-tighten the float valves, they are very fragile and are $50 a piece! I set these up initially using 4 dial indicators on the butterflies. When set them up like that vacuum syncing is not required, at least not initially. These carburetors spook some people as far as maintenance goes but I find them fairly easy to work on. Being a Honda everything just seems to make sense and many pieces have that one-way-only fit. Patience and taking some photos before disassembly are a good idea, especially for the hoses under the plenum. If you ever have your carburetors off I cannot stress enough that you replace the fuel hoses under the plenum. The ones on these low mileage carburetors were like concrete. Same goes for the o-rings where the plastic fuel delivery tubes enter the carburetors. They were very hard. Honda sells an o-ring kit for this (one kit does all four carbs). The last thing you need in the valley of your V4 is raw fuel. The vent hoses and tubes/o-rings that pipe to the little filter on the side of the #3 carburetor are usually in good shape as they are not in direct contact with the fuel. The air cutoff diaphragms were replaced in these carburetors but I just could not bear to cough up $100 (each) for Honda ones. Aftermarket cut-offs are available but I recommend re-using the original Honda diaphragm spring and the new o-ring that comes in the Honda carburetor kits.

For those of you living in Canada or the USA I recommend using fuel that does not contain ethanol. I will not go into the politics or technical issues surrounding ethanol but if you can avoid ethanol you should. In Canada one of the last fuels available that is not laced with ethanol is Shell's V-Power 91 octane premium. Other Shell fuels, all of Petro-Canada's and the locally produced fuels all have ethanol. Like the fuel pump says... "may contain up to 10% ethanol" That means they have it. Stick with Shell's 91 octane and forget about it. Do not be swayed by the higher octane fuels that run about 94 octane at 10% ethanol.
RC30 Clutch Assembly

Time to put the clutch in. The basket/gear unit is from a low mileage US bike that had an unfortunate end to life and was subsequently dismantled by chimpanzee with a ball peen hammer and a screw driver. Thankfully the clutch survived the little guy. The clutch was like new. Nonetheless all the bearings and high wear parts were replaced because I did not want monkey hair, or worse, in my clutch.  The primary drive gear is new because the clutch gear was used. I did not have the original that mated with it. Mixing used gears from different machines is a recipe for noise and wear. A new gear against an old gear is OK as long as the old gear is in good condition.

Most parts for these clutches are discontinued now. Be careful if you have yours apart.

The clutch all put together. With any luck it will only slip when I down shift. The ignition pickups, starter clutch/ignition trigger, starter reduction gear and starter have to go in yet. The steel band around the clutch basket allows the basket to be made lighter and more compact. With such a thick clutch pack the long basket fingers would get excessively thick to make it strong enough at high RPM. A thin steel band makes sure everything stays in place.
RC30 Rear Brake Caliper
The rear caliper, bracket and brake hanger. The rear caliper was fully rebuilt; it even got new pistons. All steel hardware was re-zinc plated and the brake hanger was bead blasted and got a coat of matte clear powder coating, same as the swingarm and pro-squat linkage. Never run a tap through things like the thread shown unless you have special undersize taps. Even undersize taps are not a great idea. As long as the threads are not damaged I use handgun or rifle bore brushes rotated in, or preferably right through, to clean threads out. I use brass brushes on aluminum, stainless steel brushes on steel or stainless and plastic on anything plastic or otherwise sensitive.
RC30 Crankcase, Rods, Transmission

Everything checked and double checked. Looks like I am ready to bolt the new crankcase halves together. These were the last set of new crankcases in American Honda's possession and probably in the world outside private hands. They were not cheap but a lot more value than beat up used cases and four sleeves from Millenium. I had two sets but sent one set back because of damage. Honda's packaging was almost criminal on the crankcases. A final check for things like the little metering orifice and we are ready to mate them. I pre-marked where the Threebond 1194 sealant has to go. I do not like to think much when I do this, everything should be thought out ahead of time so it is automatic. If you miss a spot it is a nightmare later. Putting it where you don't need it is bad also. We are not building a Triumph or BSA here. It's Honda so it better not leak; if it does you screwed up.

The transmission is mix of new and used but mostly new. The used parts are the mainshaft  and the individual gears that I hand prepped. I have new mainshafts but it was unethical to not re-use this one considering it was like new. The mainshaft did get a new ball bearing pressed on the right side. A new countershaft was used but Honda has superseded the original MR7 part with the 1988/89 VFR750 part. You should run a 1mm spacer on the inside of the sprocket to make up for the slight dimensional difference. Honda doesn't tell you about this so it probably is not super critical. I used a stainless 1mm thick washer from a Badger Control valve that fit perfectly. All bearings, bushings, c-clips, thrust washers etc. are new.Note: Threebond 1194 replaces the old standby 1104. 1194 is a low lead version of 1104 (now discontinued) in keeping with our so called "green" times. If you cannot find Threebond 1194 then use Hondabond 4 or Yamabond 4. They are made by Threebond. Same stuff, different package. If you use anything else you are uninformed at best.

Just about ready to start lapping valves and putting these together. Lots of parts in the cylinder heads.

Just to show the valve lifter bore protector I got from Honda. It is the white nylon thing around the spring. The spring retainers you see are the ones that supersede the original RC30 (MR7) part number. The original RC30 retainers do not have the beveled edge.

RC30 Valve Adjustment
Setting the valves was a bit of a pain as I had no baseline shim thicknesses to work from with everything being new (even the bolts). I had to guess at shim thicknesses, install all the cams, check clearances, then tear it all apart again and install the calculated correct shims. I nailed them all, no third tries. Honda shims are arm twisting expensive so I bought two of the Hot Cams shim kits to get enough to start off. The Hot Cams shim kits go up in twice the thickness increment that Honda ones do so I had to buy almost a full set of Honda shims in the end to get the valve clearances perfect. Those are iridium tip NGK plugs in there, nothing but the best. The guy I bought the cams from in Spain tried to convince me front and rear cams are the same! This was done to justify the fact that he sent me two front intake cams. Some guys will try anything. I bought a new rear intake camshaft to compensate for his behavior. The other three cams were taken from a new engine back in the day so I had no problem doing this. The lobes were on the high end of spec and the inner/non-replaceable needle roller bearings like new. One seal was damaged on one of the outer bearings so I replace the double ball bearing/seals on that cam. Another outer bearing on one of the other cams had some rust visible on the outer race so I replaced it in a fit of caution. The seals are something to watch for as the cams need the seals functional and in the correct places or you will starve the lobes of oil. There are left and right cam bearings for a reason.
RC30 Oil Pan
Nice finish for an oil pan. I also have an old VFR750 oil pan I might chop up some day to hold a bit more oil.
Most of the oiling system ready to go in. The oil pump in the top right was in excellent condition but I rebuilt it with internal components from an RC36 oil pump. Only the three cast housing parts were re-used as they differ from the RC36. The RC36 has an extra gear set to push oil to the cooler so the housings are machined differently and have an extra relief valve.
Rc30 Zinc Plating
My friend Bill once told me everyone has their level of detail. This is typical of the parts I replated. I did not use the kickstand spring, I used a new one. When you find yourself replating c-clips you know it is going to take a while before you insert the key to start it.
RC30 Valves
New Honda valves being hand lapped to the valve seats in the brand new cylinder heads. You can buy aftermarket valves for RC30's but I prefer using Honda parts when I can. Most aftermarket valves are some type of stainless steel and I like steel for the service this will see. I did exactly what Honda said to do and checked every seat width. Very important on the exhaust side. The valve on the left is ready to install after putting some moly lube on the stem. I used a very fine lapping compound (1000 grit) to lap them in. Some guys say you do not need to do this. I say otherwise, and so does Honda. Just do not overdo it. I'm sure there a lot of experts out there who will disagree but they have probably never torqued a cylinder head bolt or do not know how to use a lapping tool.
RC30 Wiring Harness
If there is one thing that will drive you to drinking it is electrical problems when a bike will not start. To alleviate this I used a spiffy new wiring harness. This harness is for a US or Canadian bike so the daytime running lights will work properly. It fit perfectly. Excellent job whoever made it for Honda. It was worth the $180.
RC30 Forks
The fork legs. You would not recognize these fork legs from what I started with. It was a lot of work to refinish these. After many hours I achieved the correct profile finish (and correct directions) then powder coated them with gloss clear directly on the aluminum. It took a week to get the black aluminum oxide off my hands. These forks were assembled from parts. The lower legs and clamps from New Zealand, most of the internals from a guy in Japan and the rest is new including the fork tubes from Honda that are wallet melting expensive. I never want to do this again and was stupid not to use the nice spare set I had. Nothing like a challenge though. RC30 fork springs are known to be quite weak (around 0.75 to 0.77 kg/mm). I put some HRC 0.85 kg/mm fork springs in these and a slightly heavier fork oil than the ATF Honda recommends. I could not bear to cut down the discontinued spring spacers so I made some from another bike to the correct 129.6mm length for the HRC springs. The HRC springs/spacers have ever so slightly less of initial preload but make up for it before the static sag is complete.
RC30 Shock Linkage
The forged aluminum shock linkage completely rebuilt with new bearings, seals and shafts. The bolt in the picture was not used. I have a new linkage but rebuilt a used one because I wanted the finish (bead blasted with matte powder) to match the swingarm and pro-squat linkage that are used castings and forgings respectively. The bearing where the knuckle bolts to the swingarm is different than the rest, it has no roller cage so extra rollers can take the higher unit load.
RC30 Wheels For Powdercoating
The wheels. Stock Honda parts but the front is a 3-1/2" wide NC30 wheel. These have been glass grit then glass bead blasted. They subsequently got a coat of pearl white powder for something a little bit different. I didn't clear coat the wheels, they would have been too gaudy for my liking. The pearl finish still looks nice in the sun but doesn't jump out at you as tacky any more than plain white wheel is.
RC30 Exhaust Polished
I polished the stock exhaust headers. This was a colossal waste of time as I later decided to wrap them with black ceramic heat tape. Where you can still see header pipes at the cylinder heads they turned some neat colors after the first start as is usual with polished stainless steel exhaust systems.
RC30 Showa Shock Absorber
A stock RC30 Showa shock absorber. The internals were rebuilt by Ed Sorbo at Lindemann Engineering, the external stuff was done my me. Ed cut down a bumper for the shock to my dimension The original bumper was missing but a NOS shock I have provided a good dimension for the bumper.
RC30 clutch line
This is typical of my experiences with aftermarket parts for most anything. Generally very well made but something is always not quite right. This is a clutch hydraulic line from Goodridge in the UK. Though beautifully made it doesn't fit the factory Honda clamps as it is too small of diameter. I made it a larger diameter by cutting off some fuel hose and lengthwise slitting it. I then put some shrink sleeve over the fuel hose to hold it in place. Pops into the clamp nice and tight. You have to do this before you finish installing the hose so the shrink sleeve will go over the the hose end. I put some nylon spiral wrap on the hose where it passes over the unused, and generally considered unnecessary, lug for the steering damper which could damage the hose.
RC30 Instruments Clocks and Gauges

The gauges. Mostly used parts in excellent condition. The speedometer cover is new. I have a couple new gauge foams but this one was so nice I had to re-use it. I replaced every bulb in the gauges so they are nice and bright. The speedometer is unique to Canada with km/hr on the outside and mph on the inside. The fella I got it from lived in the US. He wanted a mph speedometer on his Canadian bike. One man's junk is another man's treasure.

I was missing the little harness for the tachometer and as luck would have it Honda discontinued it. With some electrical trickery I made one using an NC30 harness. One of the pins/wires had to be relocated from outside the connector to inside it and one wire deleted from the connector to make space. After the modification it was exactly the same as an RC30 harness except the connector color. I could have changed that but did not. Sometimes you just have to let things go and live with it.

I had a new speedometer wiring harness but I made one of those from NC30 parts also. You can read how to make both of them by reading Article 7 on the Articles Page.

RC30 Rear Suspension
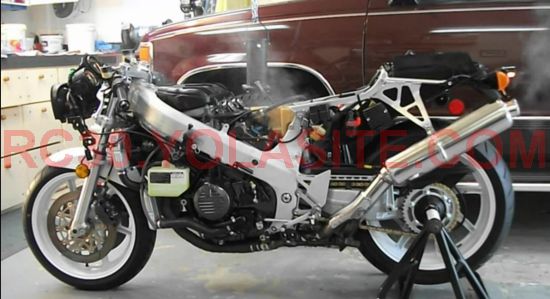
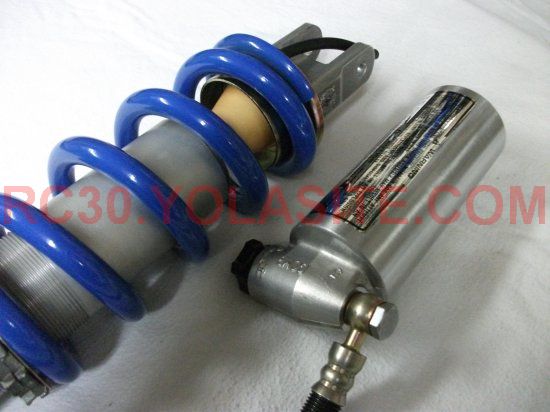
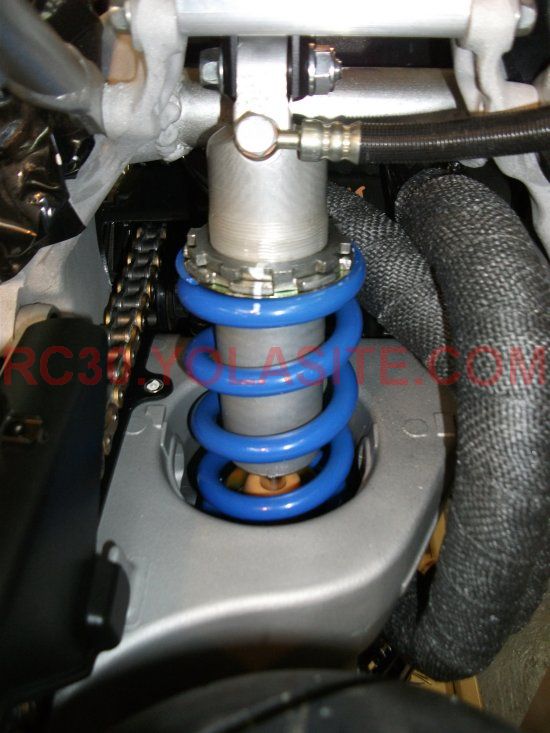
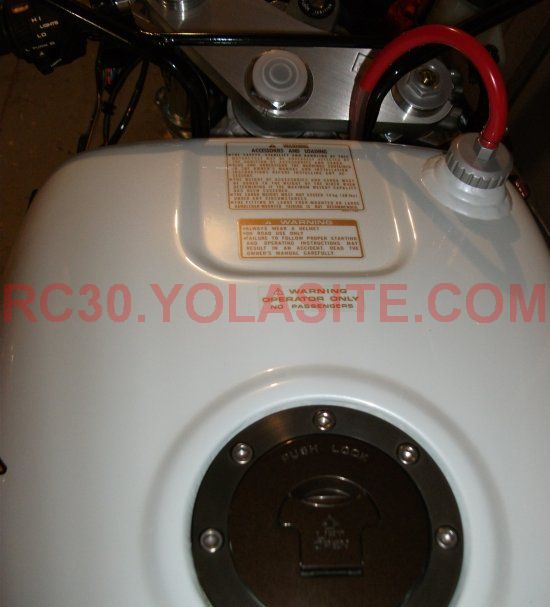
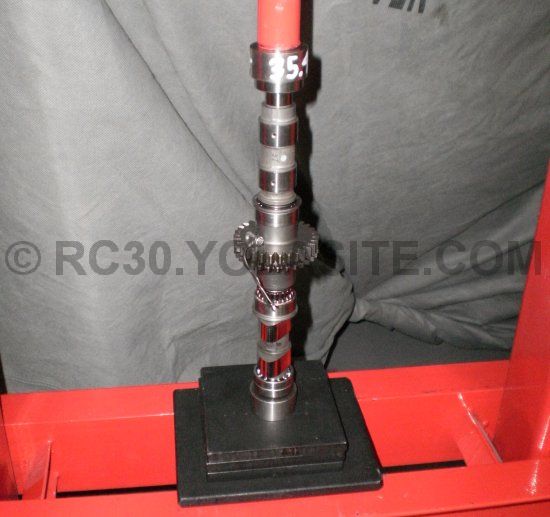
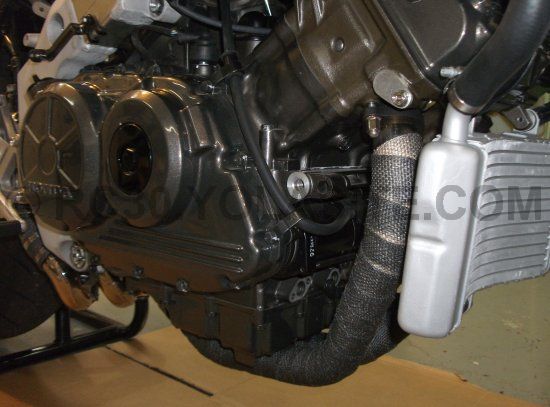
Almost done back here. I used a custom made ride height adjuster just because I had one. I had to destroy a 1-1/16" open end wrench to be able to adjust it on the bike though. My Dad would turn over in his grave if he saw what I did to his wrench. Sorry, I will make it up to you some day. The 
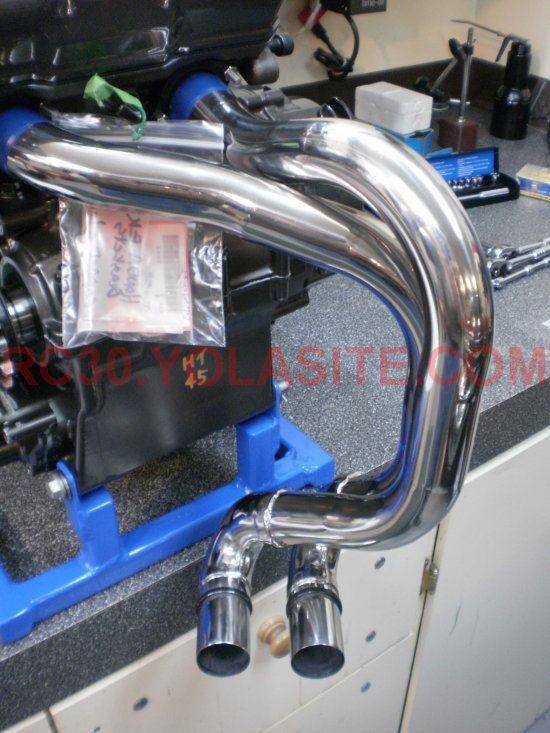
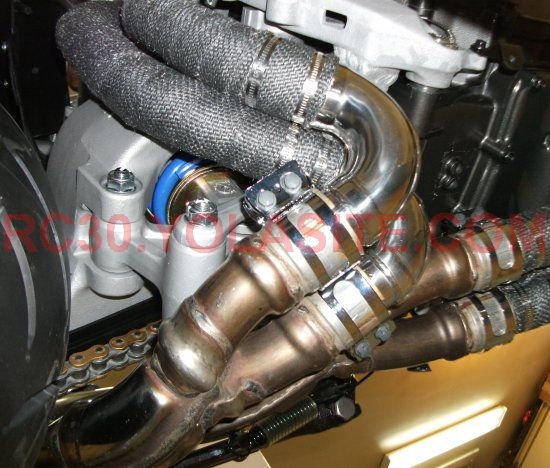
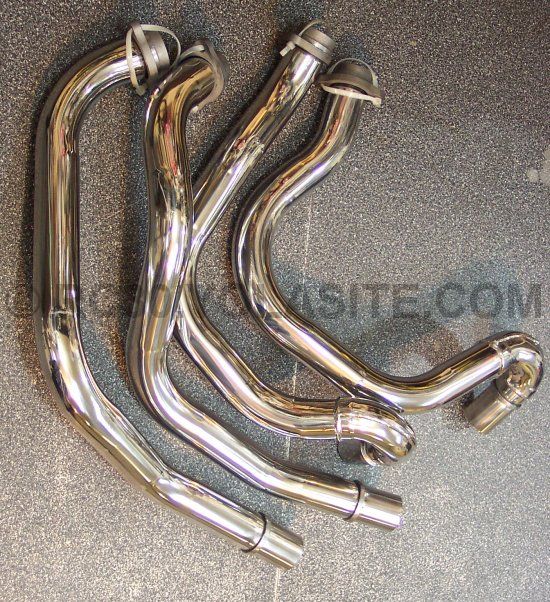
exhaust wrap is horrible stuff to work with. Makes me itchy just looking at it. The two rear pipes are really close together and the exhaust wrap touches between them but it is not a functional problem. For you guys putting those Ladybird systems on your bikes consider wrapping the pipes instead of putting those hokey heat shields on. You get the added benefit of reduced under-seat heat and your shock absorber, thigh, genitals etc do not bake as quickly.

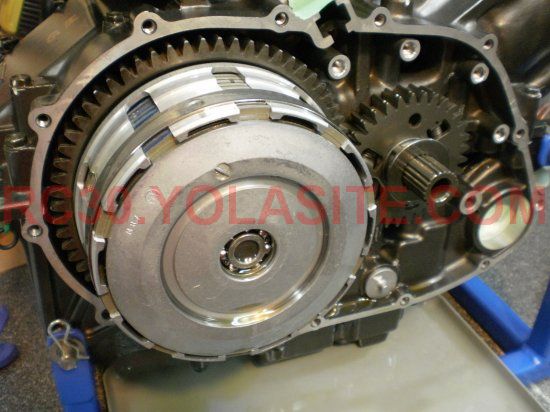
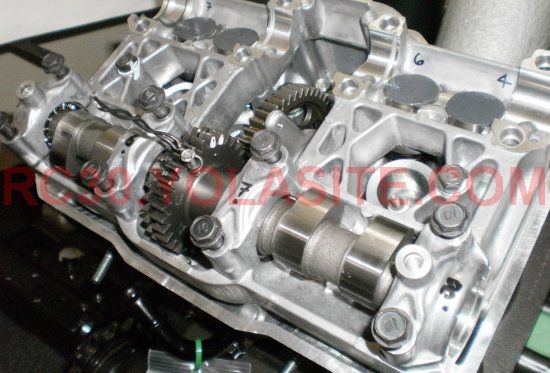
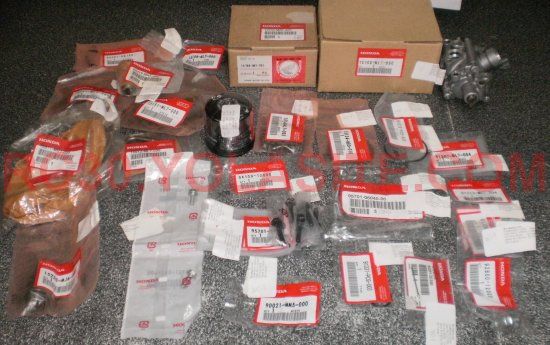
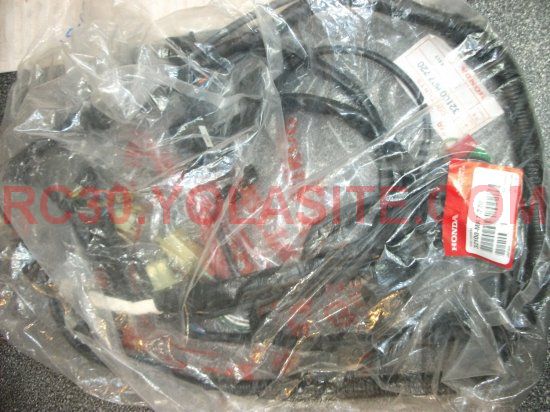
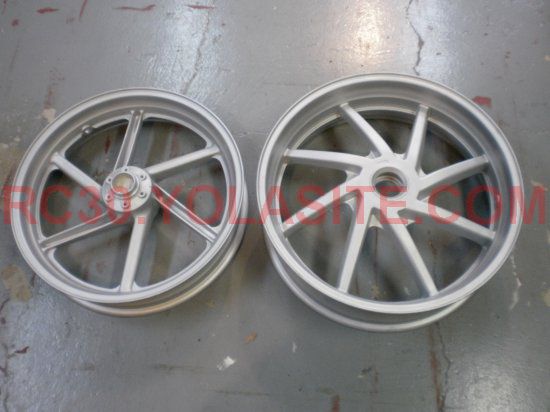
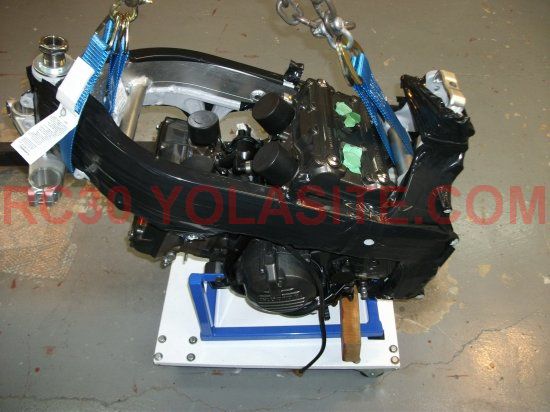
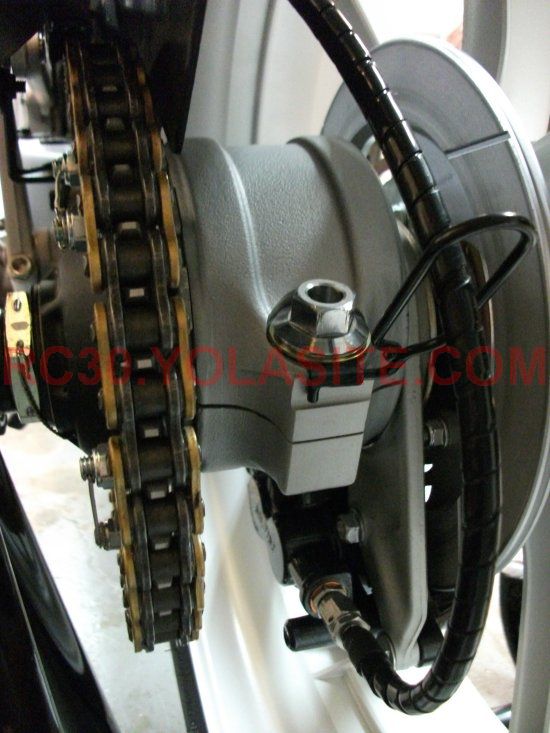
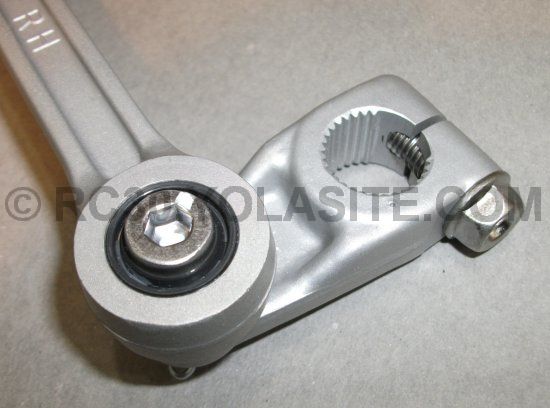
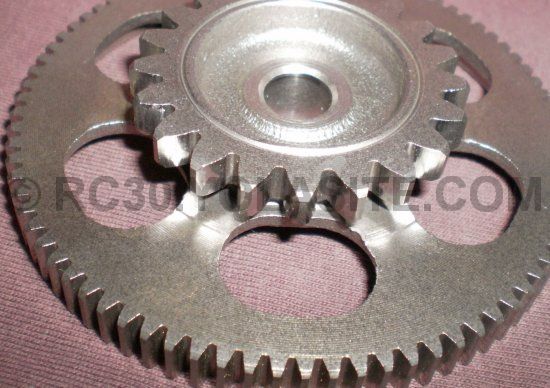
The chain is a new Honda one that came from a new bike in 1988 that went racing with 520 kit parts. The sprockets came from the same bike so I got to use one of the original small sprockets with the floating o-ring things on it.

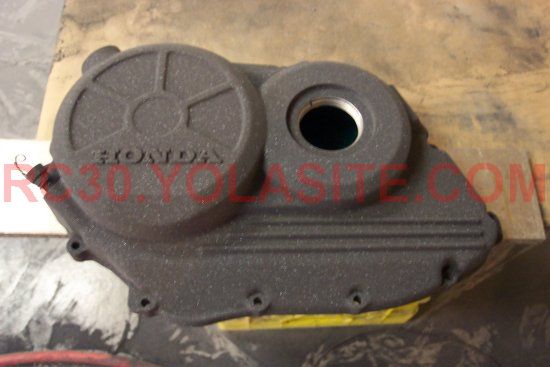
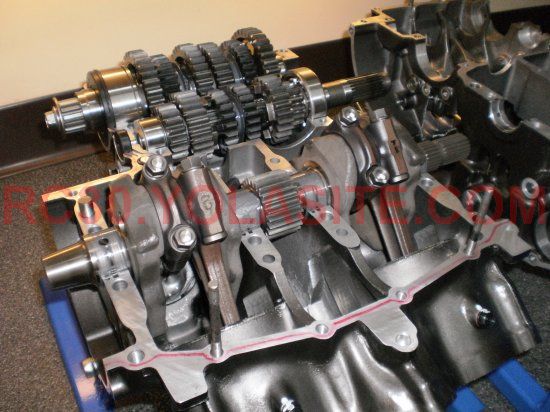
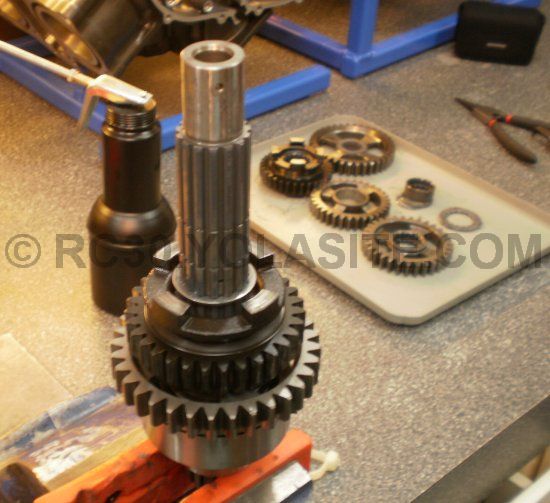
A word of advice. Put the chain on the sprocket BEFORE you put the engine in the frame. If you try to do it after you have to remove the sprocket cover, shifter cover and water pump or break the chain and install a link. I ended up doing it the difficult way. I did not want a rivet link in my original Honda chain.

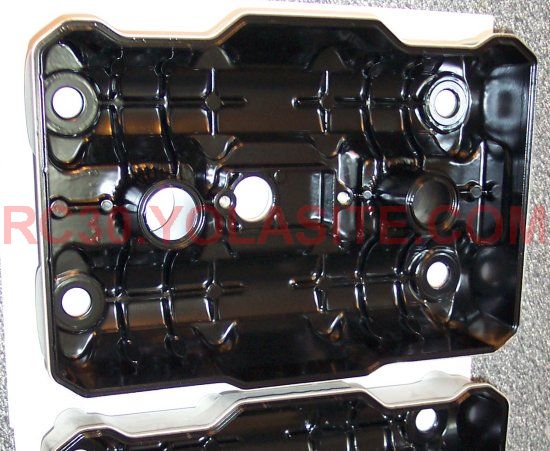
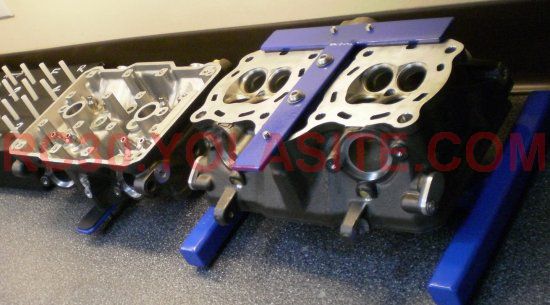
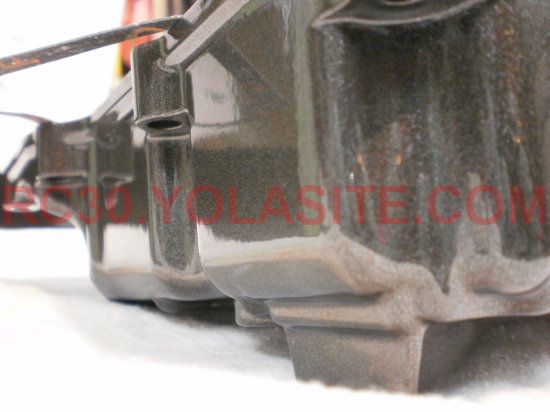
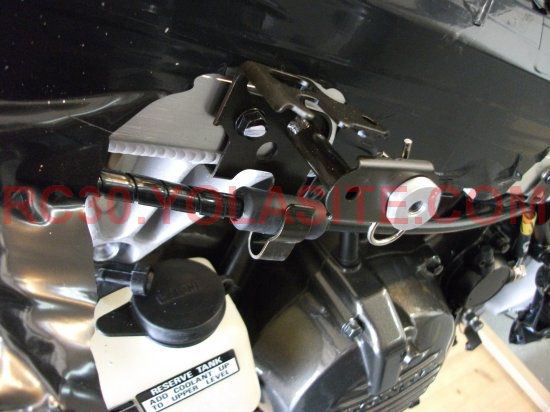
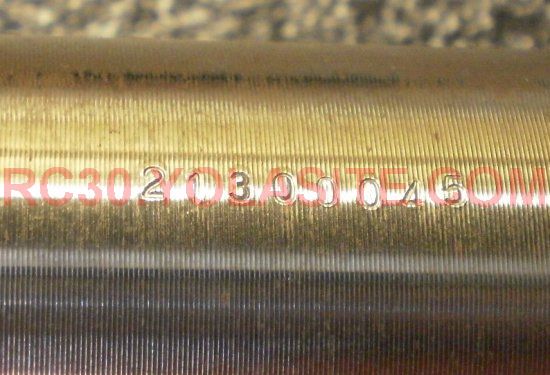
Note the ugly Mig weld on the cross tube ahead of the damper where it meets the frame casting. Honda used two different weld processes when welding the frames up. Honda used Mig (aka GMAW) welding on the inside where you cannot normally see it and Tig (aka Heliarc or GTAW) welding wherever a bystander would see it with the bike assembled. Mig welding is much faster than Tig and anyone can do it, but Tig produces a higher quality weld with no spatter and a smaller heat affected zone. You can see and feel Mig weld spatter on the inside of RC30 frame rails. Honda also Tig welded the seat subframes together so they look very nice.

The guy at 1:46 in this Honda video is Tig welding on the outside of the frame (and a fuel tank).

RC30 Engine and Frame
A mating ritual you will not see on Wild Kingdom. After this it got hoisted to the assembly stand for final engine bolt torquing. Installing the frame on the motor is so much easier than trying to lift a 180 lb engine into a 20 lb frame don't you think?

This is approximately the time I should have put the chain on. Everyone makes mistakes.
Most of the steering stem parts. The NOS steering stem cost me a fortune and I still grumble when I think what I paid for it.
The steering stem has a serial number. The 21 prefix is the same coding as the frames; that meaning it was made in 1989.
RC30 Front Suspension
The front end going together on the assembly stand. The steering stem, triple clamp, fender, fork tubes, horn/brackets, bolts are all new. I have a restored upper clamp without the HONDA emblem in it but I don't mind the looks of this one even though the casting finish is really rough compared to the older versions. You can see the rough casting in the picture. The handlebars were used ones but in really nice shape. I polished them to Honda's standard, maybe a bit nicer and clear coated them with DuPont Chroma clear. Some guys like "billet" stuff (which is not made from a billet) but I think they are cheesy alongside these one piece forgings Honda went through the trouble to design and specify. Nobody makes aftermarket forged clip-ons. I used all new Honda bar end weights. The bar end weights have an extraordinary amount of pieces considering what they do.

Most people would shake their heads if they saw the underside of one of these front fenders. Fingerprints in wet paint everywhere. I thought it was cool. A sign of a low production bike and the parts for it.
The rotors are made by Moriwaki and are 310mm works of art with cast iron rings with beautifully machined aluminum carriers. I polished every one of the stainless steel floating buttons, clips and washers. Doing this forced me to visually inspect each one. Moriwaki also made a 320mm version of these. The white marks you see on the caliper bolts and brake line fitting are there for the same reason Honda does it. When a bolt is torqued it gets a swipe with the paint pen. I like to be able to look over a bike after it is complete and know that a bolt was torqued.
Ready to go back here it looks like. This is a good mix of new, restored and aftermarket. The Goodridge brake line could have been an inch longer but it did work alright. I put some spiral wrap on it to protect the protective outer covering of the braided line. Safety wiring on the sprocket bolts and axle nut replicates what Honda did, except mine is done with more care.
RC30 Canadian Lighting

 The turn signals, license holder, reflectors, rear fender and the tail light are unique to the North American market (Canadian and US bikes). The seat cowl is unique to the Canadian bike only, it has a decal around the petcock knob to indicate ON-OFF-RESERVE and the knob has no markings. On all other bikes (excluding US bikes) the markings are on the knob with a little arrow on the cowl. Our Safety standards require certain wording, thus the minor change made. The decal is a good idea on any RC30 if you are getting a seat cowl painted.

The bad news is that Dunlop no longer manufactures the rear tire in the picture. It is the correct size Roadsmart in 170/60-18. This tire has been deleted with the advent of the newer Dunlop Roadsmart II. A 160/60-18 is made in the new version, though it appears a 170/60-18 is available in Japan and Australia. This tire hits the rear fender slightly.

You have to love the waviness in the Honda FRP bodywork. Bubbles are not good but wavy is how it was made. Bubbles in RC30 bodywork are caused by the porous FRP mat used for building thickness absorbing moisture. After the moisture gets in heat causes water vapor to form under the paint and blister it before the moisture can migrate out where it came in. I have never had it happen but it is normally very dry where I live. Lower cowls are infamous for this. The engine and exhaust provide the heat source. Some people have had this happen to new bodywork in storage (very poor storage I might add).

RC30 Fuel Tank
Canadian spec warning decals on the fuel tank. In the correct locations of course.
RC30 Tool Kit
An RC30 would be incomplete without the factory tool kit(s), stand and owners/shop manual. Strangely enough a manual was never made for the Canadian spec bike. Too low of production to bother with I suppose. This bike will carry a European manual in English. I do not have a picture of the stand but it was restored to like new, even a new sticker and nylon eccentric. The tool kit was bought from a friend in Japan but I had to track down an original spark plug socket and buy a new 0.7mm feeler gauge to complete it. The bag was replaced with a new one that is much darker than the original but still has the funky yellow stitching. I use the original tool bag to hold the other "SUB TOOL SET" as Honda calls it. As always, the tile work is impeccable.
RC30 Exhaust Wrapped
The underside. I am fortunate I purchased new exhaust clamps when you still could. The bolts used for the clamps are correct for the service. Do not ever use a zinc or cadmium plated bolt for the exhaust clamps. I am sure everything in the picture will get dirty soon.
Honda VFR750R (RC30)
Completed except for the front bodywork and to put the tool kit in the back. It has to make some trips in the back of my truck yet so that will have to wait. There is a picture on the Street Bike Pictures page that shows it with bodywork.

This bike is required to meet all of Transport Canada's regulations in order to be registered for the street. Fortunately I built this motorcycle to Canadian standards and it did meet the requirements when it was inspected, right down to the cross sectional area of the reflectors.
If you made it this far down the page I thought you may want to see a few more random pictures with short descriptions.

Click on a picture to view them full size.

Click on the thumbnail to get an idea of what the entire parts list looks like for this bike. 

There are some people who do not know me but have stated, insinuated or somehow assumed this bike is not ridden or is parked in a living room. Well.... This is the RC30 I ride the most, that is what is was built for, and that is what I use it for. If something breaks or wears out that's no big deal really, I don't need to find people to do the work for me.

Make a free website with Yola